In the context of architecture and urban design applications, it is common to create massing models to demonstrate how structures will look in context so that they can be discussed. These are commonly produced physically, which have a fixed shape, or digitally which, although variable, require skill to manipulate and visualize. In order to facilitate discussion during interaction and reduce the barrier to entry in creation and manipulation of massing models, low-cost tangible construction cubes which exhibit nonpolar magnetic behavior were developed. When brought together our 3d printed cubes adhere and maintain contact when moved. The cubes exhibit nonpolar behavior mating in any face to face orientation and do not rely on indexing features. This allows users to easily and rapidly create massing models which can take a wide variety of forms, be quickly and repeatedly reconfigured, and be moved as a single unit.
Cube Development

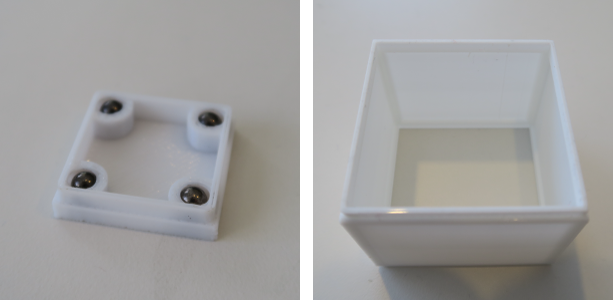
From left to right: 3D printed cube with holes for magnets and acrylic caps | 1in cube with solid construction | 2in cube with a friction fit wedge cap. The magnets can be seen sitting in the cavities of the cap. The solid cube was too heavy and the wedge cap was difficult to place the magnets. | Hollow wedge capped cube with visible internal structure. The structure was visible and the surface was inconstant.
Left: Ball and socket fitting of the magnets into the corner of the end cap allowed for easy assembly. Right: Interior support frame uses 45 degree chamfers to convince the printer to create a thin wall with no interior support structure.
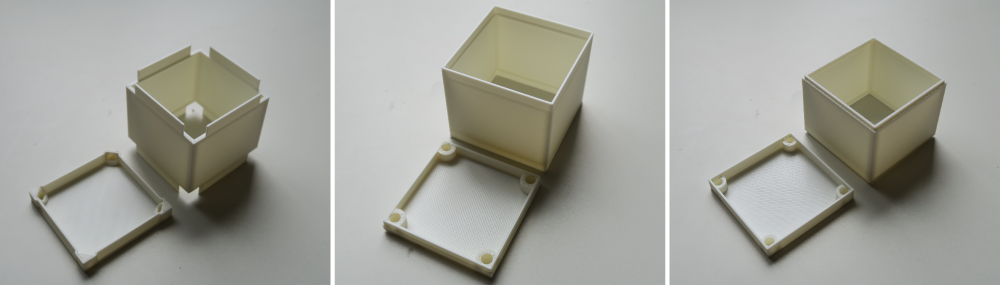
3 Cube designs. Left: Design 1 uses a 45 degree insert which provides best adhesion but is difficult to assemble | Center: Design 2 Fits the lip of the tube over the end cap. This design does not have good adhesion between cubes due to the added wall thickness.| Right: Design 3 fits the end cap over the tube. This design is easier to produce, assemble, and has good attraction between cubes.
Manufacture and Assembly
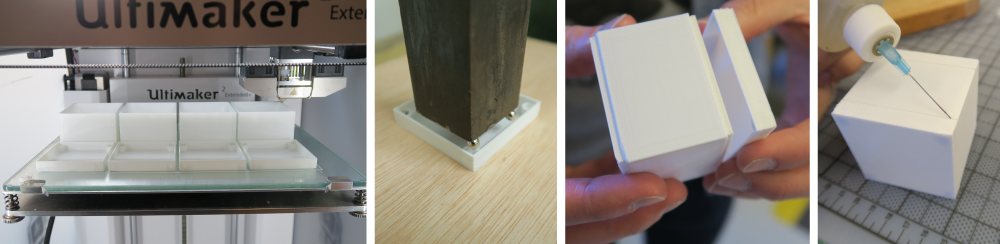
The cubes are 3D printed on a desktop 3D printer for less than $1 per cube | Spherical Magnets are then inserted into their sockets in the cap using an arbor press | The caps fit onto the body of the cube | Plastic weld is used to secure the caps.
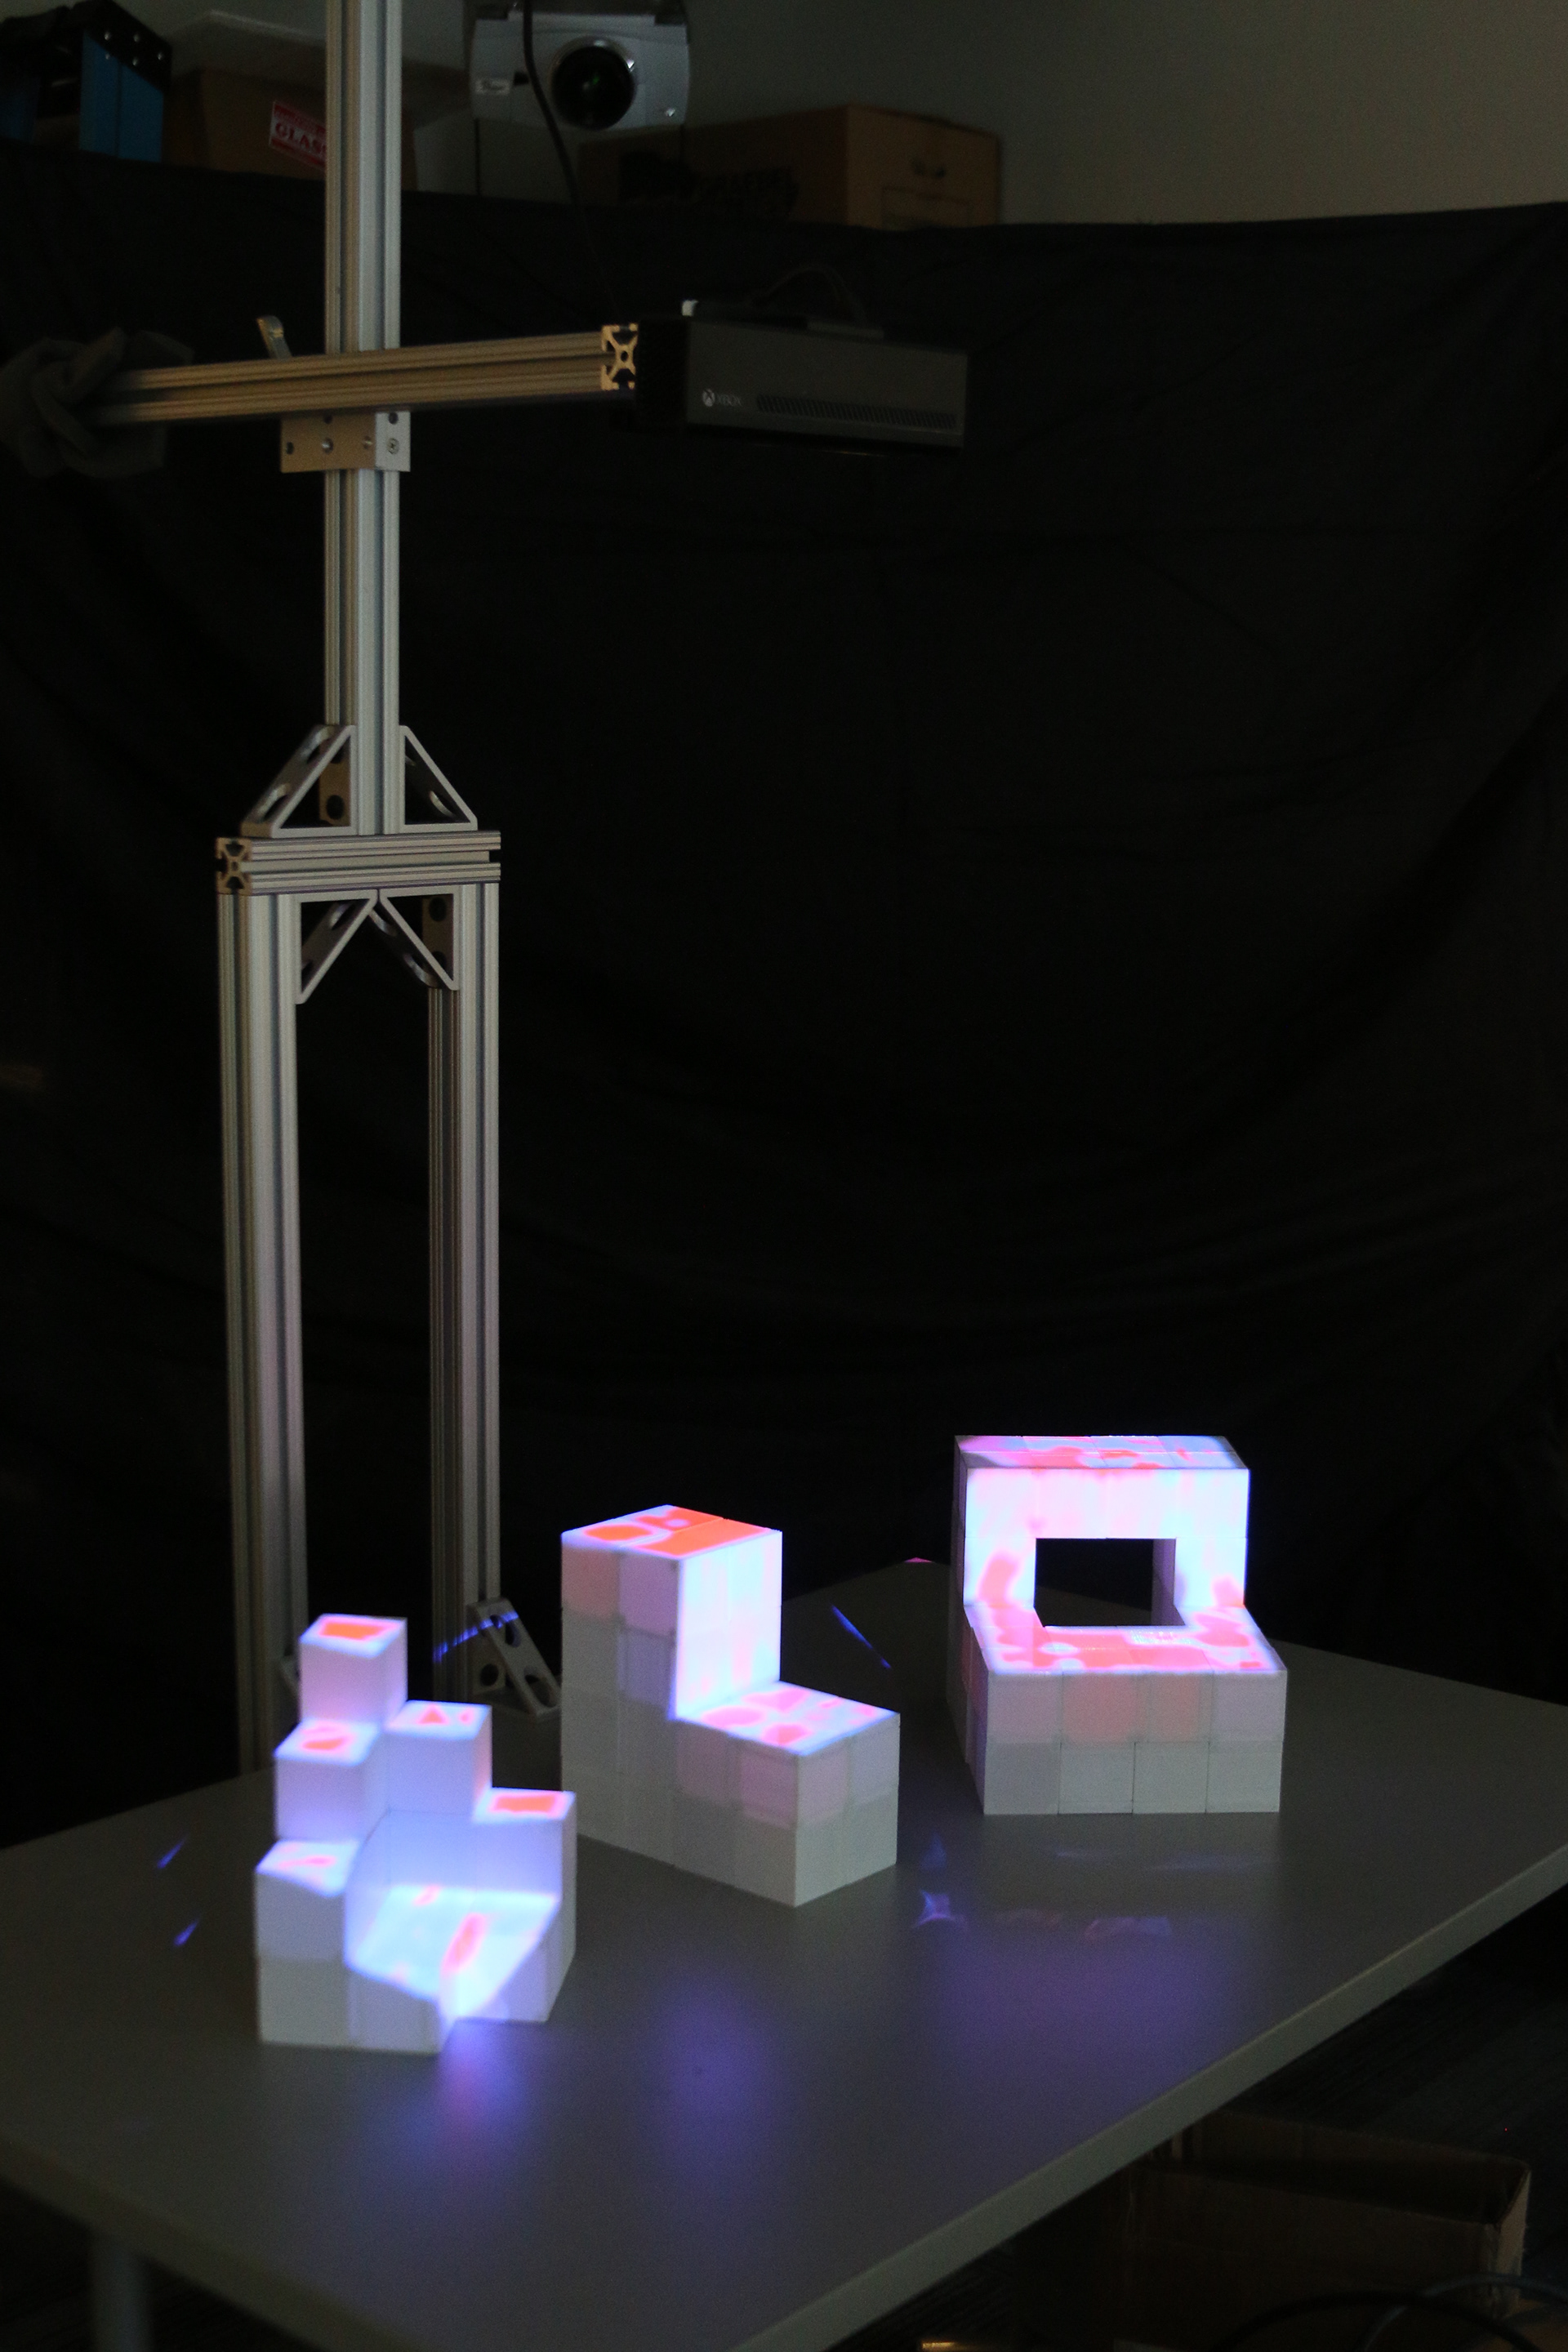
Cubes in Use

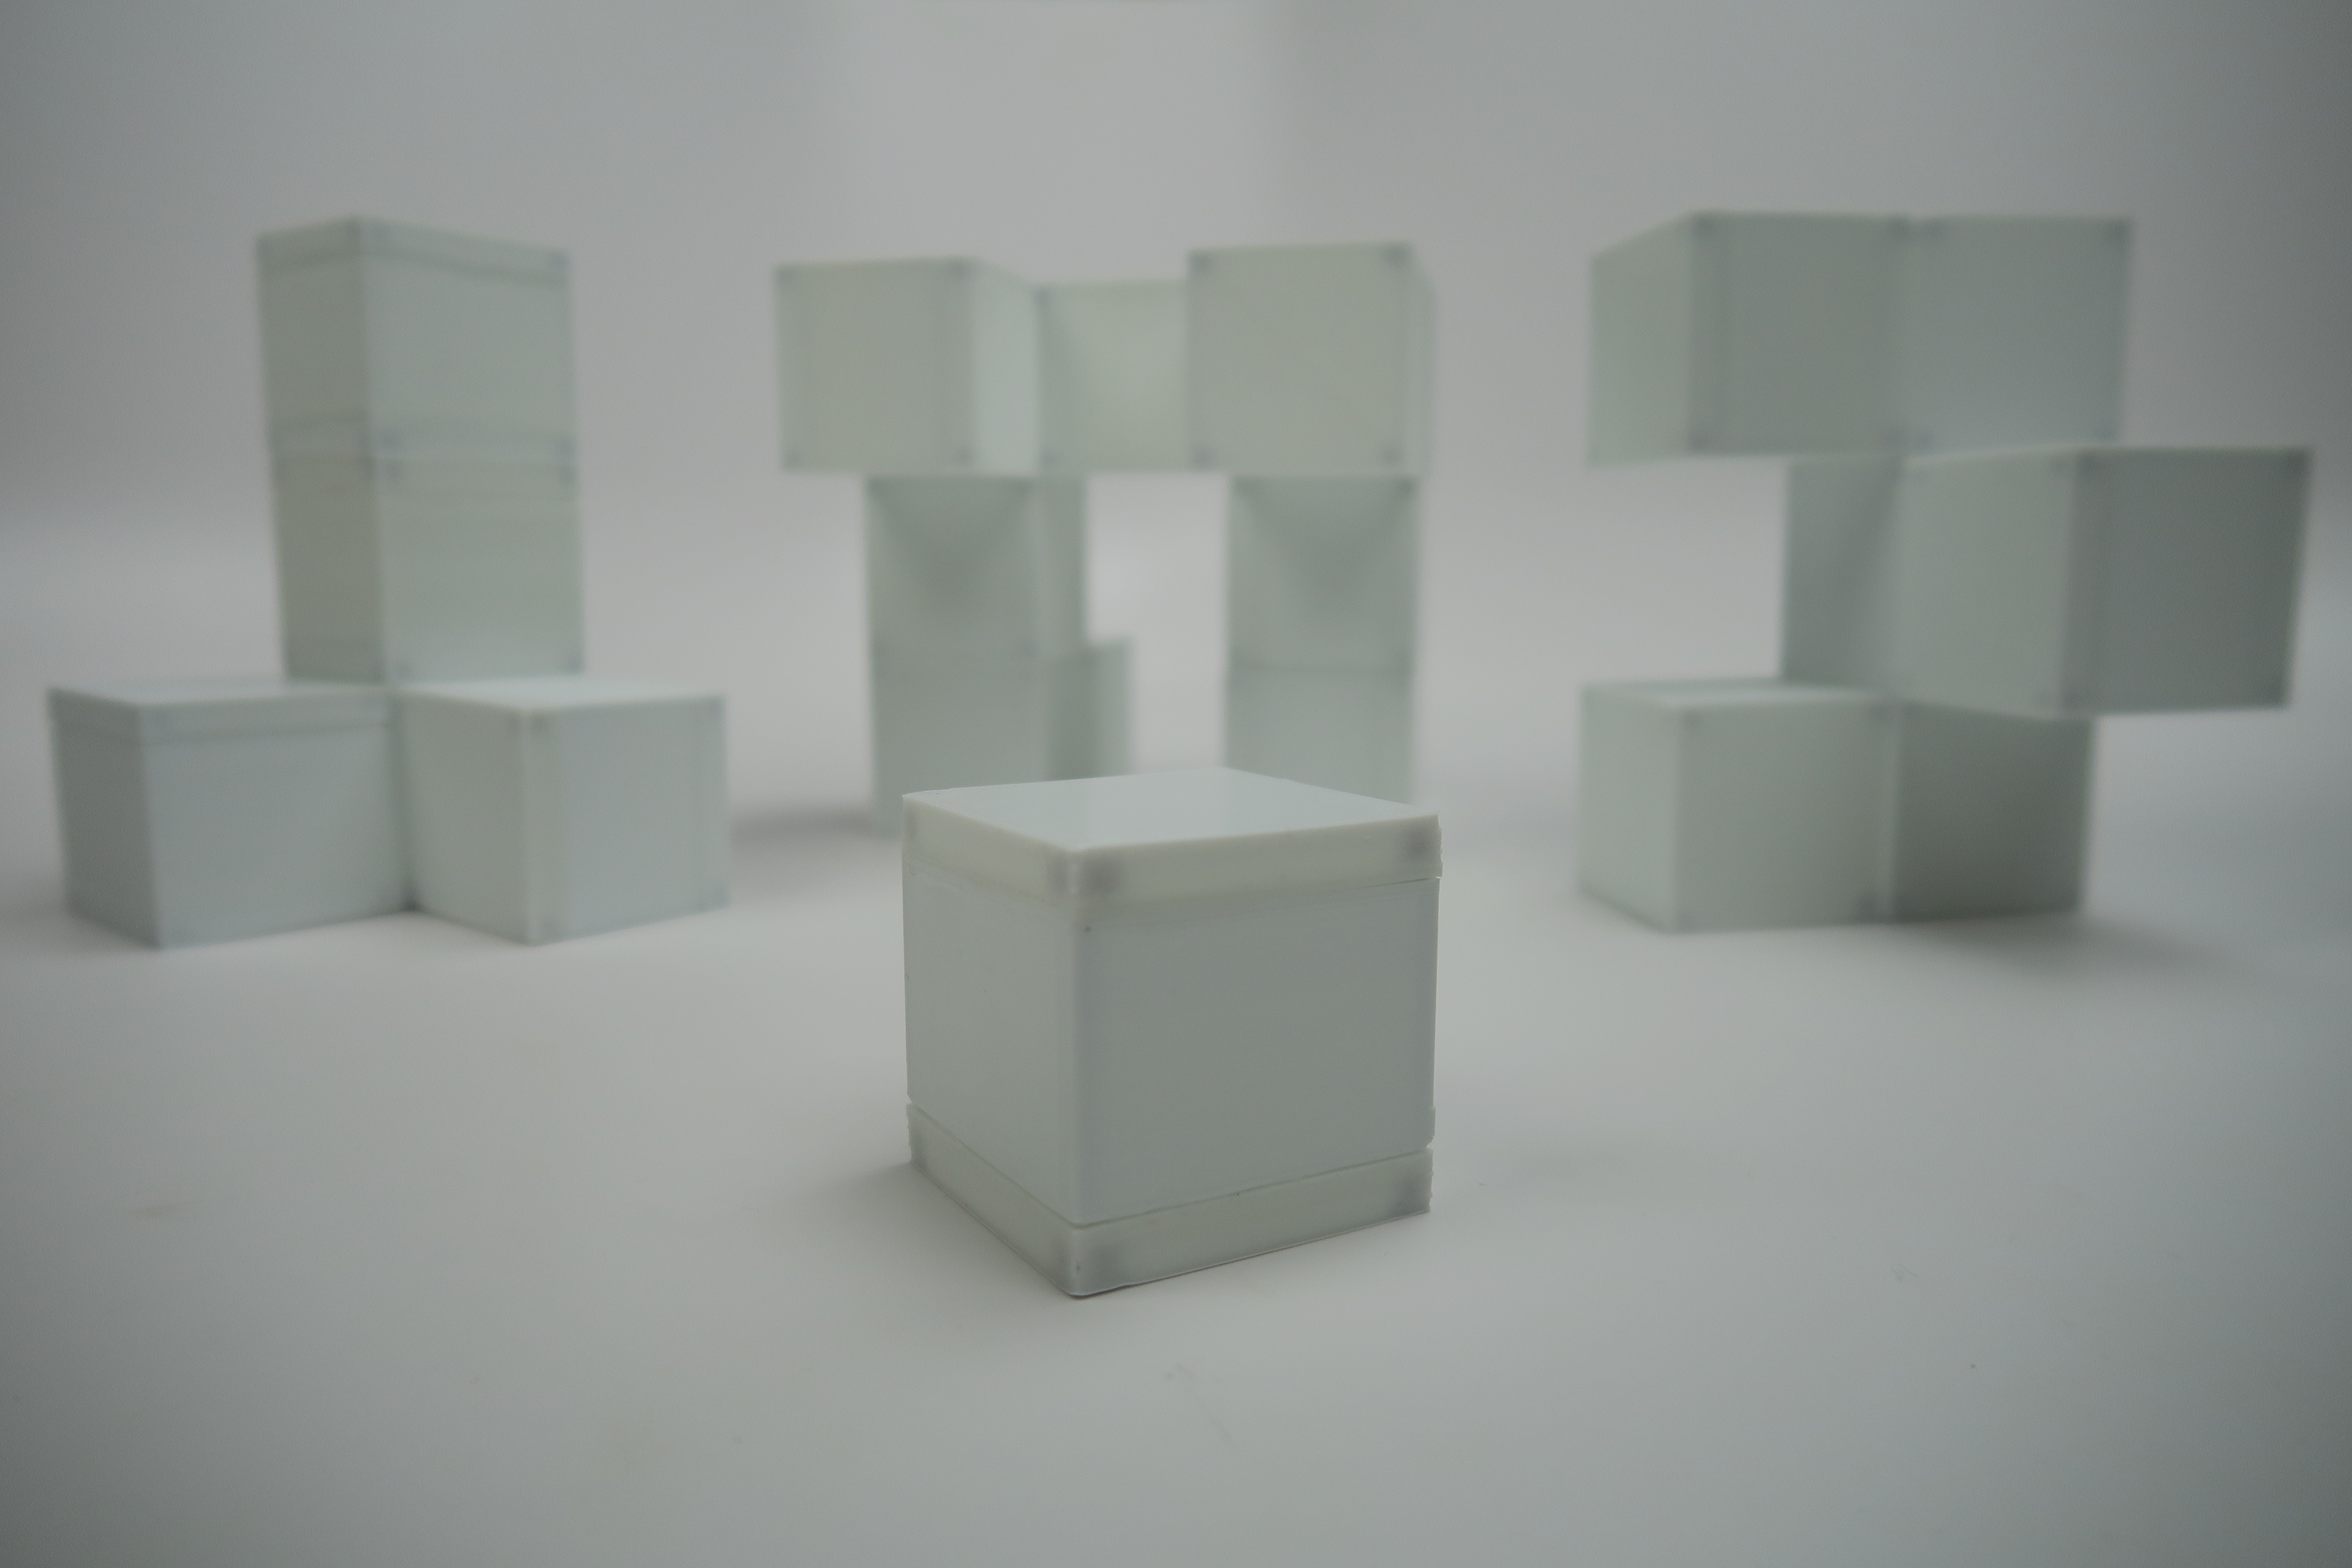
The design of the cubes allows for 3 main types of forms to be created, the solid, the hollow, and the cantilever. The simplest form, the solid, is created from
effectively stacking cubes on top and next to each other (Figure 5). The solid is representative of most building geometries. Due to their light weight construction and that they attach together from any direction the hollow is created by filling a void between 2 cubes but having no cubes underneath. Hollows can be used to create tunnels, bridges, or Menger Sponges (Figure 6). Combining the strength of bonding between cubes, their minimal weight, and the multiple attachment direction, we can even make cantilevered structures, which extend into free space anchored from one cube.
effectively stacking cubes on top and next to each other (Figure 5). The solid is representative of most building geometries. Due to their light weight construction and that they attach together from any direction the hollow is created by filling a void between 2 cubes but having no cubes underneath. Hollows can be used to create tunnels, bridges, or Menger Sponges (Figure 6). Combining the strength of bonding between cubes, their minimal weight, and the multiple attachment direction, we can even make cantilevered structures, which extend into free space anchored from one cube.

Future Work

LEFT: Cube illuminated with a cell phone flashlight (left) next to an unlit cube (right). RIGHT: example of a circuit board insert which LEDs and communication hardware could be applied to and fit within a cube.
The system cubes are intended to be used in combination with a kinect and projection mapping to display solar analysis information directly on the cubes.
The current design utilizing the ball and socket method of magnet containment allows for the magnets to rotate and the cubes to attach on any face without repelling. It also keeps the magnets internal which results in a flat clean face. The thin wall thickness use of inexpensive purchased parts and manufacture using desktop 3D printing allows for the cost per cube to be kept low and for large numbers to be produced, albeit slowly. As work progresses on this project we will explore various sized cubes and begin implementing them into planning exercises.